I purchased the NYC (New York Color) Individual Eyes palette for brown eyes at Rite Aid for $2.49 at half price, but I believe it is typically $4.99. This palette is in the color Union Square.
I wanted to post a tutorial and review of this product because I am always looking for inexpensive palettes that work well. The reason I chose this palette in particular is because I have had a good experience with NYC in the past, and I liked that this palette also included a primer and cream highlighter as well.
This is the inside of the packaging, which is great especially for beginners because it gives a pretty clear description of what the colors can be used for.
I began by using the primer/base. I have never used an eye primer before so I don't have very much to compare this primer with, but I was very happy with the texture and application. The primer is much thicker than I was expecting, and could even be used as a concealer if it matched your skin tone. It did a very good job of covering any veins or spots on my eyelids.
I put the primer on just with my fingertips, and it spread on very easily and comfortably.
Next, using the suggestion of the packaging I put the second darkest color all over my lid and found that the primer did not crease or come off. The second color is very pigmented and I did see a noticeable difference in the look of my eyelid. It looked a lot more polished and clean.
After creating a good base I took the third darkest eyeshadow and using the provided applicator, blended the color into my creases and outer corners of my eye creating a winged effect.
To add some color, I repeated the same step with the purple eyeshadow as well.
Below includes both colors.
Now, using the lightest eye-shadow and an eyeshadow brush I blended the light color in on my eyebrow bone, underneath the lower water line and in the inside corners of my eye to give a more awake effect.
Because I was using this palette for school, I decided not to use the actual cream illuminator because I did not want a shiny effect, but if you want to use this it would work on the eyebrow bone and inner corners of the eye.
The next steps include products that do not come with the palette, but are inexpensive drug store items as well!
To add a more dramatic and clean look, I wanted to use a thin liquid eyeliner that would just add some volume to my lash line. I use Prestige Cosmetics Liquid Eyeliner and create a thin line beginning at the center of my lid, and then sweeping out.
Make sure that once you reach the corner of the eyelid you sweep the wing of eyeliner towards the tip of your eyebrow.
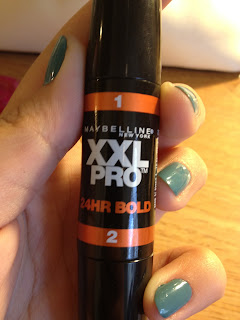
The last step for the eyes is to add mascara on your lashes! One of my favorite mascaras is Maybelline's XXL Pro 24 Hour Bold mascara which includes two steps.
I swiped the first mascara into my lashes making sure to focus mainly on the base of the lashes. I repeat this step with the second wand, but focusing on the length of the lashes.
Now, your eye look is complete!
To add a pop of color you can ad your favorite lipstick or lip balm. I am wearing Maybelline's Baby Lips in Pink Punch!
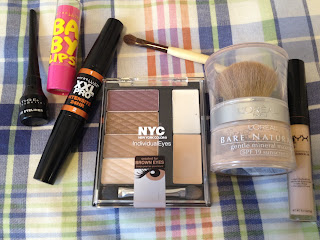
Below are all of the products I used to create this look. Comment below if you have questions or requests to see a tutorial or review on any of the other products!!
Thank You!!!


OMG, que linda cara y que lindos dientes. Escribiría en inglés, ya que soy una niña de 17 años que lo maneja muy bien, pero creo que a veces necesitamos ser mas humildes, y aprender otros idiomas (: Por cierto, te sigo en instagram y fui la que te invité a ver mi blog jijijiiji Saludos desde Chile! <3 Me estoy volviendo adicta a este blog, es muy bueno.
ReplyDeleteMakeup Palettes For Brown Eyes
ReplyDelete